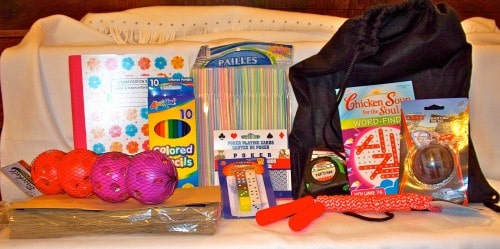
How do you prepare for the worst? Read our tips on how to create and store your emergency pack.
The 72-hour emergency kit, 96-hour kit, or my favorite “bug out bag” is the first BIG thing to put on your emergency preparedness to-do list. These are the must-have survival items that will keep you in tip-top shape for emergencies of any type, anywhere.
Think of creating your emergency kit as the “cleaning out the garage” task on your to-do list – it feels huge and time-consuming and screams at you every time you look at that list – but when it finally gets done you can breathe a huge sigh of relief.
Don’t Wait! Get Started Today
You may even get a greater sense of satisfaction putting this emergency kit together than getting your dishes done! So, why not start today?
Don’t forget the immortal words of Confucius:
Success depends upon previous preparation, and without such preparation there is sure to be failure.”
Just like cleaning out the garage, making and assembling a 72-hour kit is often the task that gets put off the longest, so don’t wait until it’s too late!
Somehow, we never think to prepare for the unexpected until it’s too late. Today is the day we tackle the garage, but we’ll take baby steps.
Step 1: The Basic Emergency Kit List
In order to keep yourself organized, it may help to print out your packing list, one for each kit. For the basic necessities, you can download the list at Ready.gov, the Federal Emergency Management Agency’s website.
Depending on you and your surrounding environment, it will make sense to subsequently personalize this list to fit your needs. Basic items include:

- Water! This will be your heaviest item, as you need 1 gallon or roughly 4 liters of water per person, per day, for at least three days (both for drinking and sanitation).
- Depending on where you live and if you have access to a large body of water, also consider these portable water filter bottles
- Food: Prepare at least a three-day supply of non-perishable food. Look to our 72 Hour Emergency Food Kit for tips on how to prepare and pack your own supply. Think lightweight and high nutrient yield!
- Sleeping bags that pack down small: Get a 3-season sleeping bag ready for each member of the family. If the emergency might require you to bug out, get sleeping bags made of down; they’re (ultra)light, they’ll keep you toasty, and if properly maintained they should last a lifetime. A down sleeping bag is quite an investment, but they can be used on many camping trips to come and even in your own home in case of home power failure.
- Emergency shelter. You might consider getting an emergency shelter if the bug out scenario involves getting out of car and needing shelter for the night. A good emergency shelter will keep the rain out and keep some of the body heat in, but make sure that you test it BEFORE you actually need it. Always test all your gear beforehand.
- Survival/ bushcraft knife. A knife is an absolute must-have in your 72-hour emergency kit. You will need a knife for basic food prep tasks but it will come in handy when setting up shelter, batoning wood for fire, or for self defense. Don’t rely solely on a multi-tool in an emergency.
- Battery-powered or hand-crank radio and a NOAA Weather Radio with tone alert. Don’t forget to pack extra batteries for both.
- Flashlight and extra batteries
- First aid kit
- A whistle to signal for help
- Dust mask to help filter contaminated air. The most effective of these is the N95 mask.
- Plastic sheeting and duct tape to shelter-in-place
- Moist towelettes, garbage bags and plastic ties for personal sanitation and disposal. To keep this kit environmentally friendly, consider using biodegradable trash bags.
- Wrench or pliers, necessary for turning off utilities in your house before leaving and for future practical use.
- Manual can opener for food. The most basic, tried and true of these is the P38
- Local maps. This is critical! In an era when most of us rely on our smartphones for navigation, it is extremely important to learn how to read a map. Take ten minutes while preparing your kit to familiarize yourself with your area on the map. Mark down major landmarks for reference. Consider adding a compass as well.
- Handgun. During disasters, some people lose their sense of lawfulness, so there are very few things that can give you the upper hand like a Glock when negotiating with a wannabe criminal being an immediate risk to your life or belongings when SHTF.
- Cell phone with chargers, inverter or solar charger.
- Changes of clothing for 3 days.
- $20 dollars in small bills and change.

Where to store your emergency kit
With this 72 hour emergency kit complete, it can be easy to feel overwhelmed by the sheer amount of things you have to pack, particularly if you’re a family of four or more. Don’t panic! We have all of the tips to make organizing and packing this kit a stress-free experience.
What kind of receptacle do you want to designate for your emergency kit? Keep in mind that portability is key. Furthermore, this kit can already be quite heavy, so minimize the weight of your container as much as possible.
Let’s look at a few options.
- Rolling Suitcase
- Back Pack
- Rolling tub
- Rolling garbage can
- Fishing Vest or Tactical/Military Vest
There are a few more questions to consider when selecting the right storage unit. What will you be able to comfortably carry if you have to evacuate? Do you have small children who can’t carry things themselves?
In that situation, a rolling suitcase may be a better option. Do you anticipate not having access to a car? If such is the case, a large backpacker’s pack may make the most sense.
Step 2: Properly Packaging Your 72 Hour Emergency Kits
For years, I have had my emergency kit in a large red canvas backpack. I purchased it second hand at a local supply shop about fifteen years ago. It’s sturdy and is absolutely filled with lots of handy pockets. But, all of a sudden, I feel like it weighs a ton! With age, we always need to re-evaluate some physical expectations.
It’s hard to imagine now how I’m going to carry my emergency kit over any distance with that thing on my back. For me, it’s time to make a new plan.
If you have kids of your own, then you know that getting out the door on time is a challenge, even on the best of days. In an emergency situation, moving small children and getting them organized in a flash can rapidly escalate into a nightmare.
Let’s look at disaster survival from the same standpoint of taking a car trip. Loading the car itself can be a big pain. Getting everyone and their stuff in the car and on the road is stressful. Now imagine having to do this in 15 minutes or less with only the essentials.
You need to be able to get everyone and your emergency items into the car as quick as possible, minimizing trips in and out of the house. One regular backpack for each child really means that you’ll be hauling three or four or more backpacks out to the car.
I can guarantee that this is not going to go smoothly, especially if you have infants or young children. So, you need to decide which type of emergency kit packaging is the best fit for your space and family.
We recommend a few various options:
The Rolling Tub 72-hour kit

This tub is fairly large and can hold five kits. It has rollers on the back and handles on the sides for easier pickup. Personally, I find this tub to be a bit cumbersome to move around. However, on the plus side, it does take less time to move this in a hurry than transporting each bag individually.
This is also a good option if you have a garage, where you can store it near the car and make quick transportation into the trunk stress-free and seamless.
Pros of rolling tub emergency kits:
- If you have small children that cannot carry a portion of their own supplies, this may be your best option.
- Good for young families, where mom and dad will be the ones doing the heavy lifting.
- Ideal for garage placement.
Cons of rolling tub emergency kits:
- It can be hard to find things when all the kits are grouped together.
- It gets messy once everyone starts to access their items.
- Because it is so big, it is hard to stash in closets.
The Rolling Suitcase

The rolling suitcase is great for stashing your 72 hour emergency kit if you are making a collective kit for more than one person, but perhaps a smaller family than would use the tub.
This option is portable and even small children are able to pull a heavy suitcase out of the house as long as it has wheels.
This also would work well for couples, or for individuals who decide to be super prepared. You can fit a lot into a 72-hour suitcase kit! Some roller suitcases, particularly the duffel variety, also come packed with pockets, ideal for organizing things like small medical equipment or food.
You will also be able to fit quite a bit more bulk into this kind of storage than a backpack, even the big backpacker bags.
Use the ones with rollers like this Rolling Duffel Bag from Amazon that has plenty of pockets for compartmentalizing things. I like this because you don’t have to open the whole suitcase to get at your important items like flashlights and money.
Pros of rolling suitcase kits:
- Portable and easy to move
- Easy to compartmentalize
- Fits items for more than one person
- Often offers more protection than cloth bags, ideal if you’re concerned about it get knocked around.
Cons of rolling suitcase kits:
- They can cost a bit more (try to find one secondhand to remedy this. Gumtree is a good source for bulky used items like this.)
- Not portable in the wilderness.
- Cannot carry these on your back if you’re in a hurry and don’t have transportation.
The Fisherman or Tactical Vest 72 Hour Emergency Kit

Instead of a backpack to hold your emergency, you can also prepare a vest kit for each family member. Make an emergency plan to meet at the closet or wherever else you hang up your vests, slip them on and head out the door.
An important thing to remember is that you cannot fit all of the FEMA-guideline list items in a vest, no matter how large and bulky a vest you find. Water, for example, is going to have to be carried separately. In that case, Camelbaks are a great complement to your vest kit, as they contain very portable water bladders plus more handy pockets.
There’s a lot of different vests out on the market. Where is the best place to start? To narrow down your search and tailor the results towards vests that will make for a good emergency kit carrier, aim for vests with two dozen or more pockets.
Also important are carrying loops like this one for youth Amazon. Fishing vests can be found at most sporting goods stores. Adults can use fishing vests or tactical/military vests with pockets. Check to be sure that vests labeled “youth” are small enough for your children’s needs.
A final consideration to make here is that comfort is important when selecting a 72 hour emergency kit vest. You want to pick something that is going to offer breathability if you live in a warmer climate, or warmth and insulation if you live in a place like New England or the Pacific Northwest.
Pros of fishing/tactical vests:
- Each family member can carry a small portion of their pack and the rest can be placed in a large suitcase
- These are great for kids that need the tactile texture of items next to their skin. Believe it or not, it can also bring them comfort to feel the items close at hand and within reach.
- 26 pocket variety can be found in most sporting goods stores
Cons of fishing/tactical vests:
- There is no place to carry water
- It’s easy to over pack and weigh yourself down
- A vest will not fit everything so you’ll need another carrying option too, such as a Camelbak or tote bag.
The Backpack Option for a 72 Hour Emergency Kit
The most popular option for packing your 72 hour emergency kit is certainly the classic backpack. For adults, go for an ergonomic backpack that supports heavy load lifting and offering maximum comfort and breathability.
These factors are not as important for children because they will likely not be carrying full packs, but rather lighter parts of the family kit, while mom and dad do most of the work.
For the adults, hiking packs, also known as backpacking packs, capable of carrying 50 liters or more, is the prime choice. You can find an enormous variety online, and shop around at military surplus stores for good deals and for the types of packs that will hold lots of pockets and are ideal for heavy lifting.
This is critical in preventing back and neck injuries and increasing durability.
Establish weight distribution
If your child can carry a backpack with most of what they need in it, then a small or medium hiking backpack is a good option. Be sure to get the kind that offers chest and waist straps to disperse the pressure and weight.
It gives children a sense of security when they know where their things are and that they have everything they need. For the younger kids, pack some essentials in their small bag, and put the heavier items, including the bulk of your water supply, in your own backpack.
Follow the body weight/packing weight ratio guidelines below in order to ensure that there are no injuries. Once you’ve got it all together, weigh everyone’s pack, and take their fitness level into consideration.
If they’re not able to carry the pack comfortably, then it might be time to consider improving your children’s’ fitness levels, or consider other carrying or distribution options.
- Children: 10-25% of body weight (depends on fitness levels)
- Youth and adults: 20-25% of body weight
- Very fit : 25-33% of body weight
Check out the Amazon Back Pack Buying Guide for more tips on selecting the right pack for your needs.
Also, the individual pack will be something you’ll want if your child has sensory needs, as that weight and pressure will actually help them cope with the serious stimuli they will have encountered and help to level out their already heightened awareness. This includes children with ADHD/ADD and Autism.
Pros of Backpack 72-hour kits:
- Easy to carry
- Inexpensive
- Easy to find
- Great for kids to carry
Cons of Backpack 72-hour kits:
- Easy to over pack
- Only one person per pack
Step 3: Extra 72-hour Supplies
Purchase the items on your list, but first dig through your own supplies to see if you already have some of them. You will be surprised how many of these items are already around the house.
In addition to the basic list, at least one family member should have a big First Aid Kit (see First Aid Kit Ideas on Amazon), and everyone else should have a small kit – even if you make a simple one from the dollar store. You’re also going to need some basic sanitation items like toilet paper or wet wipes.

Also, consider adding the items listed below to your kits:
-
- Extra pair of glasses (even if you wear contacts)
- Duct tape
- Headlamps (you’ll need hands-free for dealing with kids)
- Work gloves for ALL family members
- Written copy of address book (only important ones)
- 15 Emergency Phone numbers list for your cell
- Sewing kit
- Candles (tea lights)
- Extra batteries (for each piece of equipment in your kit that requires them)
- Zip lock baggies (gallon size)
- Information – a full copy of your family plan and vital information should be included. You can check this off if you completed your emergency binder in the day 4 challenge. If you didn’t – then get it done!
If you’re nearing your budget then make a note of what you feel are the vital items and get those first. Each month make a line item in your budget and continue adding the missing items over in the next few months. Your kit can make a disaster run more smoothly and be less traumatic.
You may find these other 72-Hour Kit posts by PreparednessMama helpful:
It can never hurt to be over prepared. Pepper spray is a great addition for the adult and older children packs in case you anticipate traversing areas that are home to dangerous wildlife.
If you do have children, getting the whole family involved in the packing process can be a good way of familiarizing everyone in the family with the items and their storage location.
But more than that, you can also turn this family packing into a teachable moment, making a group plan and taking the time to discuss risk management with your children.
Today’s Challenge: Begin to Put Your 72-Hour Kit Together
Good: You have your printed list and at least half of each list assigned, purchased, and packed.
Better: You have almost all of the assignments for today purchased and packed, and a purchasing schedule for the next month to finish things off.
Best: The most important part of making your 72-hour kits is not that you (the parent) hurry and put them together. It is very important for your children and spouse to help with this process. Include them in purchasing items, planning food, and packing their kits. Complete as much as you can and schedule out the rest along with making a “due date” and family reward for when they’re finished.
What other items do you consider essential for your 72-hour kit? Leave us your ideas in the comments below.
Check out our latest posts

Preparedness Mama and its collaborators have created a one-stop shop of critical resources for families looking to prepare for disaster. We know firsthand that getting ready for the worst with a big family poses some particular challenges.
We’ve learned from the past so that you don’t have to make the same mistakes again. Fear of the unknown is one of the scariest things in life, but we hope that Preparedness Mama’s treasure trove of practical advice will make that unknown less daunting and ultimately help take the scared out of being prepared for every single one of our readers.


Leave a Reply